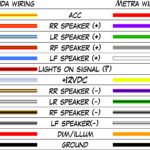
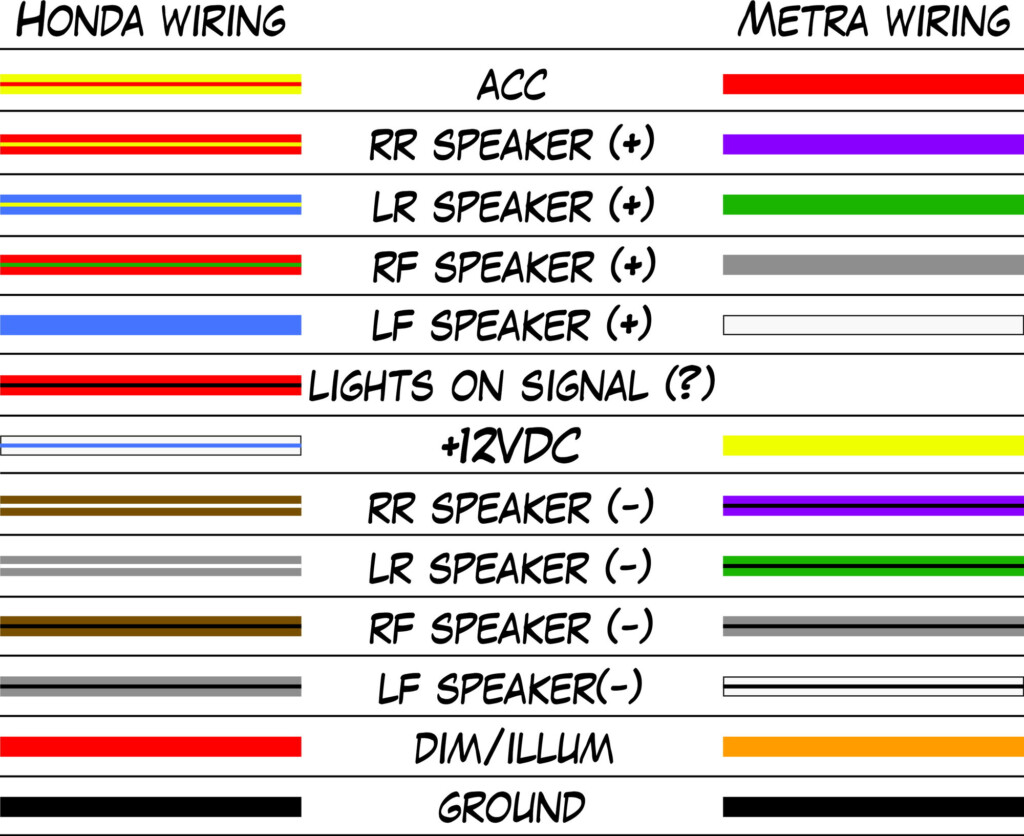
1998 Honda Civic Stereo Wiring Diagram – The Honda Stereo Wiring Diagrams can be used to check if your car’s audio system is working properly. This diagram will demonstrate which cords are connected to what element of your car or truck as well as their purpose. 3 wire connections are typically utilized for strength: the yellowish for frequent 12V power, red-colored for components and orange with white-colored stripes to light up. Each and every cable is allocated a unique coloration to signify its work. The positioning of the loudspeaker wires can determine the way that they are shaded. The colors suggested the positioning of the back speaker systems.
Harnesses
Harnesses are employed to link wires in a vehicle’s sound system. Diverse shade requirements are utilized to separate the various harnesses. The red-colored wire symbolizes changed power as well as the white-colored cable the optimistic result in the front kept speaker. You should read the instructions for wiring colors before installing an aftermarket stereo. You’ll have the ability to determine which cords opt for which lecturer by reading through cellular phone guide.
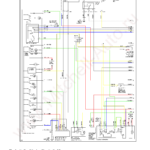
A wiring diagram helps when putting in a stereo system program in Honda. The diagram is capable of showing you which wire connections see your car’s lighting effects, which towards the battery pack and which towards the vehicle stereo. The diagram also demonstrates which wire shades opt for which fm radio elements.
You should also pay attention to the amplifier. Several automobiles have different amplifiers that plug into the manufacturing facility speaker systems. You will need to ensure that the new amplifier is compatible with your car’s factory radio in order to preserve it. An amp sidestep control enables you to make use of the amp’s power, with out affecting the factory amplifier. Although avoid harnesses might be cheaper than incorporated amplifiers, they may be still tougher to use.
Pigtails
A cabling diagram is a must when wiring your car’s stereo. It will enable you to satisfy your brain unit’s cables on the proper harness. A electrical wiring diagram can be obtained on the web to the mind system you are looking for. To ensure that the appropriate wires are increasingly being attached, you will need to confirm the colour code.
The installation of an upgraded stereo calls for you are aware how to hook up the wires and cables. You can find 2 kinds of connections on your own vehicle’s stereo process: white and red. The switched power is symbolized from the red wire, even though the white steer is for the front side correct loudspeaker. Before you start wiring, ensure you have read the instructions and checked the color scheme on the adapter harness.
You will find 4 varieties wire connections which go in your car’s stereo. A few of these wire connections are power wires. They provide frequent 12V for the car’s stereo program. The orange and red wires are being used as components. The orange with white stripes may be used to light up. There are four cables that will hook up to your speaker systems. The kept front side speaker is the white cable, and the right back presenter is the green and purple wires.
Speaker cords
This diagram will assist you to connect your Honda’s loudspeaker wire connections. You must first establish the wires with your motor vehicle. Hondas usually have several forms of wire connections: speaker, accessory and power. You can find diverse wire colours for every single variety. Every wire is colour-coded to suggest its objective. For instance, the white colored cords go to the still left loudspeaker as well as the purple cords off to the right lecturer.
After you have identified the different wire varieties, it is actually time for you to identify the ground cable. An ohmmeter enables you to do that. To test continuity, link up the ohmmeter with a ground. If you don’t own an ohmmeter you can connect one speaker wire with an AA battery, to check continuity.
An upgraded wire harness can be another alternative. This will make it easier to install and remove any uncertainty about cable hues. While the manufacturing facility wire shade codes will not be common, aftermarket wire harnesses could be. They will also give you all the information you need in order to locate power wires and troubleshoot issues.
Amp sidestep harnesses
If you are planning to install a car stereo system, an amp bypass harness is a good option. This adapter links your new stereo’s outputs to the factory amplifier’s inputs. After that you can take advantage of the factory amp’s power for driving your speaker systems. These adapters can also be less than amp integration adapters. They may need more work if the factory amp is in an unusual place.
A lot of cars come with built-in amplifiers. These require a 12v signal in order to turn on. The AMP TURNON sign is the wire that connects the top device and the amplifier. The AMP TURNON transmission, which can be located on the cable utilize of the go system, may be the blue/white-colored wire.
An amplifier bypass harness is essential if you are looking to install an aftermarket stereo system. These add-ons permit you get around the carry increase and amplifier the cable span. They are more expensive than regular stereos, but they can be programmed to add special features to your car. Make sure the amp bypass harness fits your car before you buy it. On the internet resources may help you find the correct one particular.
Gallery of 1998 Honda Civic Stereo Wiring Diagram